Reviewing the Mom and Baby Silhouette Icons Embroidery File
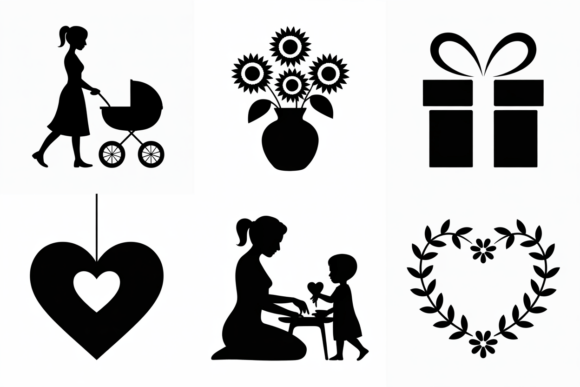
As a designer who regularly translates digital files into stitched reality, my first question about any new design is simple: how will it feel when it's finished? Opening the Mom and Baby Silhouette Icons, the immediate impression is one of gentle, classic warmth. The silhouette approach is timeless, stripping away unnecessary detail to focus purely on the relationship—the protective curve of the mother’s form embracing the smaller child. This isn’t a loud or trendy graphic; it’s a quiet, confident statement. That visual personality tells me it belongs on projects where emotional resonance matters more than decorative flash.
The Natural Habitat for This Design
I immediately picture this on a custom embroidered tote bag for a new parent, or centered on the back of a cozy, high-quality sweatshirt. The simplicity of the silhouettes means it will translate beautifully into stitch, without getting lost in fussy details. It’s a prime candidate for a keepsake: a nursery pillow cover, a personalized baby blanket, or a delicate apron for a grandmother. For small business owners and Etsy sellers, this design offers a versatile core asset. It could anchor a whole line of “motherhood” themed products—from kitchen towels to caps—providing strong brand consistency with its recognizable, heartfelt shape.
Beyond baby items, think of it as a universal symbol of care. I’d use it on a holiday gift like a embroidered tea towel for a host, or as a subtle accent on a wedding gift for a soon-to-be parent. Its mood is adaptable; it can whisper “family” on a casual t-shirt or speak “professional craftsmanship” on a boutique’s branded merchandise.
Where It Excels in Practical Embroidery
On a technical level, silhouette designs like this are generally embroidery-friendly. The solid shapes promise good stitch coverage with fill stitches, and the clean outlines should hold up as crisp satin stitches or running stitches. For an embroidery project on something like a tote bag or sweatshirt, I expect clean edges and a satisfyingly solid look. It’s also a fantastic candidate for an applique design, where you could use a contrasting fabric for the silhouettes, adding texture and reducing stitch time.
The value here for crafters and apparel decorators is in the design’s clarity. On the finished product, it will be instantly understandable, which builds customer trust. There’s no ambiguity—it’s a recognizable, professional-looking emblem of a bond. That recognition directly boosts buyer engagement in a handmade shop or craft fair setting. People see it and know exactly what it represents, which makes the product’s story and giftability immediate.
Points for Careful Consideration Before Hooping
While the design is strong, its application needs smart judgment. The single most important factor will be size. Embroidering very small versions of this on, say, a baby hat or a cap’s curved surface could compromise the clarity of the two distinct silhouettes. You need enough space for the mother’s and baby’s forms to be clearly separate. Always test on scrap fabric first at your intended hoop size.
Another consideration is fabric choice. On highly textured fabrics or thin, stretchy materials, the solid fill areas might require extra stabilizer and careful tension adjustments to look smooth. On dark fabrics, thread color contrast is paramount—a light thread will make it pop, but a poorly chosen mid-tone might soften it too much. I’d advise creating black and white mockups to see how it reads purely as shape, ignoring color.
Also, think about the product’s life. For items like aprons or kitchen towels that need frequent washing, a dense stitch area in the silhouettes could hold up well, but ensure your stitch density and stabilizer are chosen for durability.
A Designer’s Practical Notes for Your Project
Before you run this embroidery file, here’s my mental checklist:
- Always, always hoop a test piece. It reveals everything about stitch density and small detail integrity.
- Audition your thread colors against your actual fabric, not just on screen. That contrast defines the final impact.
- Confirm your machine embroidery design’s compatibility and your intended hoop size. The product description notes it’s provided in SVG and EPS formats, which are versatile, but you must check the specifics for your system.
- Inspect the design’s corners and any potential tiny interior spaces. How will they translate to stitch?
- Use the proper stabilizer for your fabric. This is non-negotiable for a clean finished product.
- Consider its use. Is this for a personal gift or a commercial embroidery project for your small shop? Clarify the licensing terms for the digital embroidery file before selling finished items.
For digital product sellers and creative entrepreneurs using this as a design asset for printable mockups, the clean silhouettes are a huge advantage. They’ll render clearly and look professional in previews, boosting perceived value.
The Final Stitched Impression
In the end, the Mom and Baby Silhouette Icons design succeeds by doing one thing very well: conveying a universal theme with graphic elegance. In real embroidery work, that elegance becomes tactile warmth. When a client or customer sees this embroidered onto their custom apparel or handmade product, they’re not seeing a technical file; they’re seeing a symbol rendered with care. That’s the core of a successful craft business item—the design supports the craft, not overwhelms it.
My judgment is that this is a reliable, emotionally potent graphic for a wide range of projects. It won’t surprise you with technical difficulties if you prepare properly, and it will consistently deliver a finished product that feels thoughtful and professional. Just give it the space and fabric it deserves, and it will stitch up into something truly special.